Flaw Detection Technique for Non-Destructive Testing

- Cleaning the surface free of dust and dirt with a piece of cloth
- Brushing the surface of the specimen to remove· scale, rust, paint etc. by a soft wire brush.
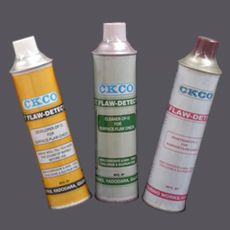
- Spraying the cleaner CP-12 to remove oil, grease etc.

- Applying the dye penetrant PT-11 adequately to cover the area to be tested. Allow 3 to 5 minutes or more for dye to penetrate into the cracks.
- Wiping off or excess penetrant on the surface with a rag.
- Again spraying the surface with the Cleaner CP-12 to remove the remains of the red dye. Note the spraying at an angle so that no latent indication are cleaned off its dye.
- Spraying of developer DP-13 evenly on the surface.

- The crack indicated with the pink dye absorbed by the white absorbent.
CKCO FLAW DETECTION TECHNIQUE :
A Non- Destructive Testing Process employing Visible Colour Contrast Dye-Penetrant technique for the detection of open surface flaws in metallic and non-metallic objects.
Welding Casting
Forgings
Machined Parts
Pipes & Tubing
Insulation
Carbide Tipped ToolsCasting
CKCO FLAW DETECTION Reveals Surface Fiaws Such as :
A Non- Destructive Testing Process employing Visible Colour Contrast Dye-Penetrant technique for the detection of open surface flaws in metallic and non-metallic objects.
Shrinkage Cracks Forging Laps
Cold Shuts
Through Leaks
Grinding Cracks
Shrinkage porosity
Fatigue Cracks
Seams
Heat Treatment Cracks
AND OTHER SUCH PARTS OF :
AluminiumCarbides
Steel
Iron
Copper o Magnesium
Plastics 0 Ceramics
FLAW DETECTION TECHNIQUE FOR NON-DESTRUCTIVE TESTING
Information on CKCO Flaw Detection Method.
A non-destructive testing procedure utilising visible liquid dye Penetrant method for detection of open surface flaws in metallic and non-metallic objects.
Introduction :
A number of non-destructive methods are used in different types of substances. The main advantage of these tests are their easy incorporation in production schedules for routine inspection of manufactured articles, maintenance and repair.
This is a quick economic and sure method of detecting surface flaws and defects not visible to the nacked eye.
Principale :
The strongly coloured pink penetrant fluid has a property of seeping into surface flaws when applied on an impervious surface. It is retained in these defects when excess penetrant is removed from the surface and show up when a developer which contains an absorbent white powder is sprayed on the surface.
Test Procedure :
The surface to be inspected should be cleaned by a soft wire brush or by rubbing with a piece of smooth cloth to remove scale rust, paint or plating, Grease, Oils etc. should be removed by using cleaner CP-12. Thus the surface to be inspected should be made quite free from foreign matters as above.
Normally smooth surfaces such as groun9, machined or sand blasted are good for this test, but surfaces which are shot blasted, shot peened, polished etc. i.e. which tend to cover the defects, will give poor results.
Penetrant PT-11 should be then be applied on this clean surface by spraying so that all the surface to be inspected is properly covered. A time of 3 to 5 minutes should be allowed for penetration of the liquid penetrant in normal cases. The exact time for the particular type of test can be determined by trial tests. The excess penetrant should be removed by a piece of clean cloth.
Then Cleaner CP-12 should be sprayed on the object to remove the excess penetrant. Care should be taken to spray the Cleaner at an angle so that no hidden indication of defects is removed.
It should be also ensured that there are no stains, spots etc. of the pink dye remaining on the test specimen.
Lastly the Developer DP-13 is sprayed on the surface to give a thin even layer, which absorbs the penetrant'from the cracks and pink spots or lines appear on the surface to give visible pink indication of the flaws giving the maximum contrast against white background..
Method of operationg self spraying cans :
Shake well before use
Use in well ventilated area.
Use in ambient temperature above 15°C.
To spray, press top button, hold nozzle 150 to 300 mm from area to be sprayed while moving can across the surface to be inspected.
If spray does not completely stop when the button is released, press button and release quickly a few times to stop the spray.
To avoid loss of gas on standing and probable clogging of nozzle, turn can upside down and spray a short jet of clear gas after each use.
Precautions :
The self spraying can is packed under a high pressure and hence it should be kept away from flame or fire.
Do not throw empty CAN in fire.
Do not allow temperature to rise above 55°C as the increased pressure may cause failore of the pressurised CAN.
Do not puncture the CAN.
Do not take internally.
Do not throw empty CAN in fire.
Do not allow temperature to rise above 55°C as the increased pressure may cause failore of the pressurised CAN.
Do not puncture the CAN.
Do not take internally.
It is for Industrial use and
CONFORMING TO THE REQUIREMENTS OF IS:3658-1966 CODE OF PRACTICE FOR LIQUID PENETRANT FLAW DETECTION.
NON-CORROSIVE AND NON-TOXIC.
CHLORINE AND SULPHUR FREE.
| DWELL TIME MINUTES | ||
| Typical Surfaces | For cracks | For other defects |
|---|---|---|
| Ferrous | 20-25 | 10-20 |
| Non-Ferrous | 10-15 | 05-15 |
| Ceramic & Glass | 15-25 | 10-20 |
| Alloys | 15-25 | 10-20 |